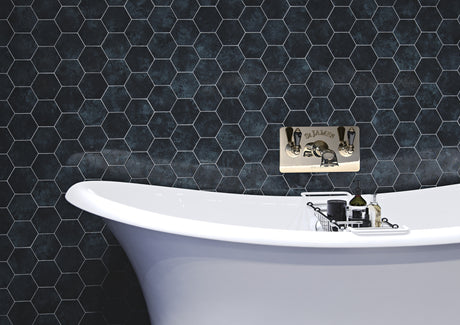


A freestanding bath acts as a striking centrepiece for any bathroom layout. Offering a touch of luxury and sophisticated style, these standalone tubs draw the eye and create a stunning focal point.
Whether you are replacing an old built-in tub or designing a completely new layout, understanding the plumbing and positioning requirements is vital. You will need to consider the tub's weight, the location of your water supply, and the required waste connections.
This comprehensive guide from Asturias Bathrooms explains exactly how to install your freestanding bath from start to finish. We will cover essential preparation steps, a detailed fitting process, and expert maintenance tips to keep your investment looking pristine for years to come.

The Appeal of Freestanding Baths
Freestanding baths offer exceptional design flexibility. Because they do not need to be attached to a wall, you can position them near a window, in the centre of the room, or at an angle that suits your layout. Available in various shapes, materials, and finishes, these baths cater to both period-inspired tastes and contemporary aesthetics. For a deep dive into the available styles, read our Freestanding Bath Buying Guide.
If you are looking for a classic, high-quality option, consider the Beaufort Richmond 1620 x 690mm Gloss White Freestanding Bath. Currently available with up to 33% off, this elegant tub features ultra-strong reinforcement and is manufactured right here in Britain. Shop now to secure low online discount prices.
Pre-installation Checklist
Before you begin the fitting process, you must prepare your site and gather the correct tools. Rushing this stage often leads to mistakes.
- Measure your space: Accurate dimensions dictate everything. You must leave a minimum gap of 50mm between the bath and any wall to allow for subtle movement. If you are unsure which dimensions work best for your property, read our guide on How to Choose the Right Bath Size.
- Check the floor strength: Freestanding tubs hold a massive volume of water. When combined with the user's weight and the bath's weight, the total load is substantial. Ensure your floor joists are strong enough, reinforcing them with thick plywood if necessary.
- Locate your plumbing: Determine where your hot and cold water pipes will rise through the floor. Mark the waste pipe location.
- Gather your tools: You will need a spirit level, masking tape, an adjustable spanner, a drill with appropriate hole cutters, silicone sealant, and a silicone gun.
Step-by-Step Installation Guide
Once your floor is prepped and you have turned off your main water supply at the stopcock, you can begin the installation. We highly recommend using a qualified plumber for the final connections to guarantee a watertight finish and maintain your peace of mind.
1. Position the Bath and Attach the Feet
Carefully unwrap your new bath. Lay a doubled-up dust sheet on the floor to protect the acrylic or enamel surface from scratches, and gently turn the tub upside down. Attach the feet using the screws provided by the manufacturer. Be careful not to use screws longer than recommended, as they can pierce the tub's inner shell.
For smaller layouts, the Beaufort Mortlake 1500 x 740mm Gloss White Freestanding Bath is a brilliant choice. It provides a luxurious soak while fitting comfortably into more compact spaces. Browse and shop today to take advantage of our current discounts.
2. Level the Bath
Turn the bath upright and move it into its final resting position. Place a spirit level across the rim. Adjust the feet individually until the bath sits perfectly level. An uneven tub will not drain correctly and can cause water to pool at the bottom. Once you achieve a level surface, firmly secure the locking nuts on the feet.
3. Drill the Tap Holes
If your bath requires deck-mounted taps and does not feature pre-drilled holes, you must drill them yourself. Apply masking tape to the area to prevent the drill bit from slipping and damaging the finish. Mark the centre line, measure the distance required for your specific mixer tails, and carefully drill the holes using a suitable hole cutter. Peel away the masking tape once finished.

4. Connect the Waste and Overflow
Assemble the waste and overflow components according to the manufacturer's instructions. Fit the overflow securely, ensuring the rubber washers sit flush to create a watertight seal. Connect the trap to the waste outlet.
5. Final Plumbing Connections
Depending on your tap choice—whether floor-standing bath shower mixers or deck-mounted fillers—connect your hot and cold water supplies. Turn the main water supply back on and perform a wet test. Fill the bath slightly and check every joint and pipe for leaks. It is much easier to fix a dripping pipe now before the bath is sealed into place.
Sealing and Finishing
Securing your bath prevents it from shifting during use and prevents water from creeping underneath, which can cause mould and floor damage. Ensure the floor and the tub base are entirely dust- and grease-free. Apply a neat, continuous bead of high-quality sanitary silicone around the base where the bath meets the floor.
Allow the silicone to cure for a full 24 to 48 hours before using the bath. For a more detailed breakdown of this process, consult our expert guide, "How to Seal a Bath."
Common Issues and Troubleshooting
Even with careful planning, minor issues can occur. Here are a few quick fixes:
- Wobbly Bath: If the tub rocks slightly when you step inside, the floor may be uneven. Double-check the adjustable feet and ensure the locking nuts are tight.
- Slow Drainage: A bath that drains slowly usually indicates a blockage in the trap or an incorrectly angled waste pipe. Ensure the pipe falls away from the bath towards the soil stack.
If you are aiming for a distinct, designer touch to bypass common white finishes, the Beaufort Richmond 1620 x 690mm Matt Blue and White Freestanding Bath delivers incredible style. The matt blue exterior creates a bold statement, backed by a comprehensive manufacturer's guarantee.
Frequently Asked Questions
What are the downsides of a freestanding bath?
While incredibly stylish, freestanding baths do present a few considerations. They are generally heavier than standard acrylic built-in baths, meaning your floor may require reinforcement. They also lack the built-in ledges found on standard tubs, meaning you will need a separate bath caddy or a nearby stool to hold your toiletries and soap. Finally, they often require slightly more floor space due to the necessary clearance gaps around the edges.
Do freestanding baths need to be siliconed?
Yes, they absolutely do. Applying silicone around the base of the bath bonds it securely to the floor, preventing accidental movement as you step in and out. More importantly, it creates a watertight barrier that stops splashes and condensation from pooling underneath the tub, protecting your floorboards from rot and water damage.

Enjoying Your Luxurious New Bathroom
Fitting a freestanding bath is a rewarding project that drastically improves the look and feel of your home. By taking accurate measurements, preparing your floor, and ensuring watertight plumbing connections, you guarantee a professional finish that lasts.
With incredible discounts and guaranteed quality, Asturias Bathrooms provides everything you need for your renovation. Explore our full range of stunning Freestanding Baths today and find the perfect addition to your bathroom.